This is a quick practical walkthrough on how to setup the current SVN trunk of Django on CentOS / RHEL 5.
This assumes that if you have a Red Hat Enterprise Linux system, that is is registered to the
Red Hat Network and that you have a valid entitlement.
Install software for this deployment:As the title says, This site is aimed at people wishing to deploy Django on RHEL/CentOS 5 with Postgresql, no religious wars please. All of the packages mentioned in this article except for psychopg2 are available in the distribution itself.
The nice guys at the
Extra Packages for Enterprise Linux have packaged up psycopg2. As this is the official repository for Red Hat and its derivatives, packages from this repo should -never- conflict
with packages from the distributions main tree.
Download and configure yum for this repository with this command:
rpm -Uvh http://download.fedora.redhat.com/pub/epel/5/i386/epel-release-5-2.noarch.rpm
Now use yum to install packages needed with the command:
yum install subversion postgresql-server postgresql-python httpd python-psycopg2Configuring PostgreSQL
Become the postgres user
su - postgres

Connect to the  template1 database with PostgreSQL user postgres:

psql -d template1 -U postgres
Yes, the default PostgreSQL user is postgres, and the linux user postgres is different, these are not related changing one does not change the others.
From the SQL command line, change the PostgreSQL user postgres‘s password:
ALTER USER postgres WITH PASSWORD ''; Quit the SQL command line:
\q Setting the password – which can differ from the password for the linux user postgres – will allow you to connect to the PostgreSQL command line as the PostgreSQL user postgres (if necessary) after changing the authentication settings in the next step.
Modify /var/lib/pgsql/data/pg_hba.conf to require password authentication for local connections:
Comment or remove any existing lines at the end of the file, then append this:
local all all passwordCreate a user on the postresql server. This is going to be the username and password to be entered in the settings.py file:
createuser -P -s -e yourusername
Enter password for new role:
Enter it again:
Password:
CREATE ROLE yourusername PASSWORD 'secretpassword' SUPERUSER CREATEDB CREATEROLE INHERIT LOGIN;
CREATE ROLE


createdb --encoding=UNICODE yourdatabasename -O yourusername
Password:
CREATE DATABASE

Then restart the postgresql server with the command
service postgresql start
Install and configure Django:
The current trunk for Django has many changes (check out
Jonathan Buchanan's post on the topic), most of which are very useful features or fixes for uncommon use.
Make a directory where you would like to keep the current svn (I usually make a django user specifically for this purpose), change to this directory, then check out the current trunk with the command:
svn co http://code.djangoproject.com/svn/django/trunk django_trunk
We now symlink this newly made directory
ln -s `pwd`/django_trunk/django /usr/lib/python2.4/site-packages/django
Making django-admin usable:
The django-admin.py command is used quite commonly during Django development and testing. You could refer to it by its complete path, but its easier just to add this directory into your current $PATH environment variable.
In bash, i'd modify $HOME/.bashrc and add the line:
PATH=$PATH:/path/to//django_trunk/django/bin/
Log out and in for the changes to take affect, to test try and run the command "django-admin.py" without a full path. You should see something like:
[root@hostname ~]# django-admin.py Type 'django-admin.py help' for usage.
Where to store your filesMake the following directories
mkdir -p /var/vhosts/virtual.subverted.net/htdocs/media/
mkdir -p /var/vhosts/virtual.subverted.net/django/The
/var/vhosts/virtual.subverted.net/django/ directory is where the django code will live and the media directory is where static files such as images, css and javascript will hang out.
Starting a project
Change into the django directory:
cd /var/vhosts/virtual.subverted.net/django/
run the command
django-admin.py startproject yourprojectnameIt should return nothing if done correctly, but a skeleton layout of a project should appear in the current directory.
If you installed with SElinux enabled, you will want to set the context on these files correctly, do so with the command:
chcon -R --reference /var/www/html/ /var/vhosts/virtual.subverted.net/
Configuring Apache
There are many political arguments surrounding the best web server to use, I don't care enough to get in to the arguments. There /etc/httpd/conf.d/hostname.conf file, following along with our virtual.subverted.net host, here is my configuration file:
ServerAdmin webmaster@virtual.subverted.net
DocumentRoot /var/vhosts/virtual.subverted.net/htdocs/
ServerName virtual.subverted.net
ErrorLog logs/virtual.subverted.net-error_log
CustomLog logs/virtual.subverted.net-access_log common
PythonPath "['/var/vhosts/virtual.subverted.net/django/'] + ['/var/vhosts/virtual.subverted.net/django/yourprojectname/'] + sys.path"
SetHandler python-program
PythonHandler django.core.handlers.modpython
SetEnv DJANGO_SETTINGS_MODULE yourprojectname.settings
PythonDebug On
SetHandler None
The name of the file isn't important, but it must end in .conf to be processed by the main apache script.
You will also want to have another single file which instructs apache to use the namedvirtualhost option to make the above named virtual host "work"
Create a file called /etc/httpd/conf.d/allow-vhost.conf, and have it contain:
NamedVirtualhost *:80
Restart the apache server with the command
service httpd restart
And you should be greeted with the "It worked!" welcome page (Shown earlier in this article)
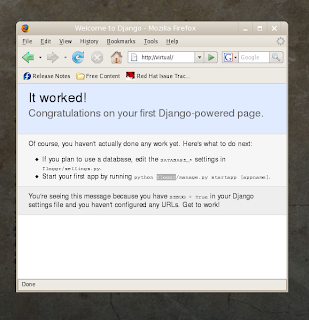
This essentially means the apache is serving up the page correctly, the next step is to configure your settings.py to point to your database.
The settings.py file should have been autocreated when the django-admin startproject yourprojectname command was run.
It should be in the /var/vhosts/virtual/django/yourprojectname directory. Here is an excerpt from the configured settings.py on my system:
DEBUG = True
TEMPLATE_DEBUG = DEBUG
ADMINS = (
# ('Your Name', 'your_email@domain.com'),
)
MANAGERS = ADMINS
DATABASE_ENGINE = 'postgresql_psycopg2' # 'postgresql_psycopg2', 'postgresql', 'mysql', 'sqlite3' or 'oracle'.
DATABASE_NAME = 'yourdatabasename' # Or path to database file if using sqlite3.
DATABASE_USER = 'yourusername' # Not used with sqlite3.
DATABASE_PASSWORD = 'secretpassword' # Not used with sqlite3.
DATABASE_HOST = '' # Set to empty string for localhost. Not used with sqlite3.
DATABASE_PORT = '' # Set to empty string for default. Not used with sqlite3.
--- snip --
The DATABASE_* settings are the lines that were modified to point to the database and username password that you should have created above.
Thats all we have time for now kids... Join us again next time. Bye for now.
If you have any corrections, let me know in the comments and I'll fix things above.


