I've gotten a few Game & Watch games off Ebay. Like most retro gear, they are usually sold "as is". These arrive in different conditions. If you're lucky, they come pretty clean. More often than not, though they arrive with different "marks" and dirt all over them.
There could be drinks accidentally spilled on the unit, even if wiped clean the liquid may have been inside the unit. Often, there are years worth of dirt stuck around the control buttons. These can manifest in several ways: Button could be sluggish to return after being pressed, Button may need to be pressed hard to activate. There could also be obvious things like droplets and things behind the screen. Possibly stuff on the screen surface itself. There are also some owners who write their names or signature somewhere on the game itself. And the worst one, someone engraves their name on the plastic with a soldering iron (no, we can't clean these ones up, sorry).


What we have here is your typical Donkey Kong multi screen (DK-52).


Its previous owner had taken the liberty to write his funny looking signature on the front plate:


The serial number is missing and there's lots of gunk on the battery compartment:


The inside is pretty clean looking. It must have been stored with the lid closed. Although the directional pad needs a bit of hard pressing in order to get to certain directions (right and up).

On to disassembly.

First remove the 5 screws at the bottom:

One thing to remember about the screws. The 9 longer screws go to where they are externally accessible. All the "internal" screws are the shorter one
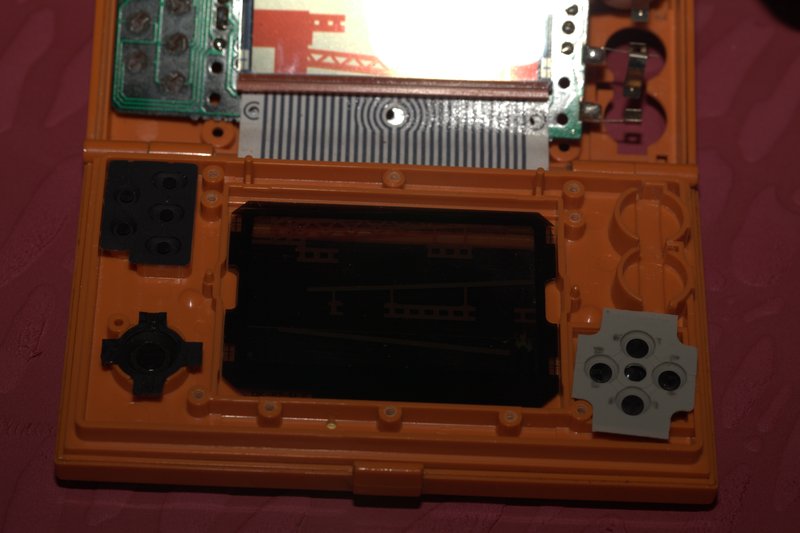
Then carefully lift up the PCB and set aside the buttons and other things that fall out.


You should have:
D pad

D pad's rubber
jump button

Game A/B/TIME rubber
2 small circular metal discs for Alarm and ACL
If the unit has not been previously disassembled, the lower display would most likely be still stuck to the PCB. Carefully bend up the LCD until it is separated.
The screen will be composed of the following (in order from top to bottom):
front polarizer
front graphic
the LCD glass part
back graphic
back reflector
Besides those you may find a small rubber "ring" and 2 rectangular transparent "things"
These are for holding the LCD steady. If you lose or do not find these, it is okay, Some unit have these, some don't. They would work fine without them.
The PCB is still connected to the back case by 2 wires for the "speaker". Use a soldering iron and carefully desolder these 2 wires.
Now, carefully pry up the upper screen (near the locking clasp). This will reveal 5 more "short" screws:

Fill up the sink with warm soapy water (use dishwashing liquid). On everything except the PCB, LCD and accesories, use a toothbrush to brush off dirt and rinse. Set aside on a towel to dry. Do not lose any of the small parts.
If your unit had something written on the top plate with a permanent marker you can try some rubbing alcohol on it:

For permanent marker writings on plastic parts, never use nail polish remover on them. You can try some toothpaste and brush.
Toothpaste is a bit abrasive so be careful when doing this as it may cause the brushed area to be shinier than the rest.


For the LCD and accessories you would need to carefully wash it by hand. It would be handy to blow out water with a lens blower so that it does not leave water marks on the surface. Do not forget which way the parts go. The front polarizer in particular will only go properly one way. If you have it the wrong way, all the white will turn black, and vice versa. The graphic transparencies should be a little more obvious how they go.
After everything is dried, assemble the LCD first on the plastic tray that it goes to. This is where the black "ring" and 2 rectangular "things" go:
Put all the buttons back in their respective places,
Do the same for the upper screen
Put the screws back on the upper screen. Now here's a secret when returning screws. Before you screw them in, turn the screw counter-clockwise until it "clicks", then screw it in. This makes sure the screw goes back into the thread it came from.
Put the PCB back over the lower screen and the screws. Before you proceed, go put in some batteries and make sure everything is back.

Also press the buttons and make sure they are now responsive.
If all is well, go and re solder the speaker back on.