The part you will want to get is the Omron B3F-4000, which is good for another 3,000,000 button presses.
You can also choose to get the long service life version, the Omron B3F-5000, which is good for another 10,000,000 operations. :)
You will also need a long enough phillips-head screwdriver, and your trusty soldering iron and some solder.
Next step, opening up the joystick. The screws are hidden behind the rubber foot pads on the bottom of the joystick. You can pry the feet off gently and they should have enough adhesive to put back on again. Note that only two of them need removing (upper left and lower right as shown in the picture below).
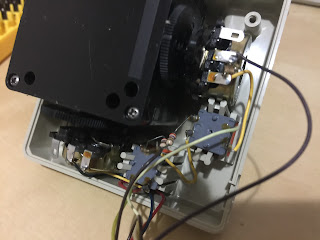
You will see that the switches (grey color) have components soldered directly to them.
So with your soldering iron, carefully detach each wire and resistor connected to the switches. Remember where everything is supposed to go! I just take photos so I can refer back to them when it's time for reassembly.
You will also note that each switch is held on to the (top) case by four clips. I found it a lot easier to do the desoldering while the switches were still attached to the clips. After finishing your desoldering work, you will have to remove them from the clips.
Warning: Be careful not to lose the spring that is in between the (orange) button cap and the switch! It helps to have the joystick facing down as you remove the old switches from the clips so gravity can assist in keeping the springs in place. Finding a proper replacement spring is hard - you can probably find a compression spring on ebay and bundle up three to make it strong enough like the original, but even then it will feel different.
Here are the old switches after removal:
Finally, resolder the connections on to the new switches.
tl;dr Give your Apple joystick buttons new life by installing Omron B3F-5000 switches.


No comments:
Post a Comment